Viewing Archive:

Creamed Corn Bubba’s Way

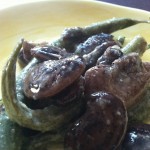
Creamed Corn Bubba’s Way!

I don’t remember when I first tried/made this recipe but it is one of those comfort foods you fall back on every so often. This recipe was named after my dad “Bubba”, though there seems to be some rankling about who really came up with the recipe I just remember getting it from him.  But with that said, he also told me when I was about 6 years old he invented the Grilled Cheese Sandwich, so consider the source.  🙂

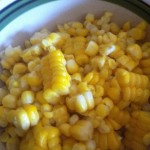
This recipe uses Brentwood Corn, it’s so simple and a special treat you might make it more than once.  We always buy yellow corn as we think the white corn is just too sweet for us. You use what you enjoy the most whether it be yellow corn, white corn or both!  For this recipe the corn should already be cooked before mixing with the other ingredients.   You can use corn from many sources of your choosing fresh, frozen, canned or ??? it is up to you.  I shucked the corn using “Ken’s Trick” from YouTube.  (Check out my Tips & Tricks page for the video)

Brentwood Corn 🙂

Local Food(s) – Corn is from Dwelley Farms in Oakley,  California (we bought a case!). Here is another one of my  favorite  sources forBrentwood Corn.

Creamed Corn Bubba’s Way

Cooked Corn Kernels from 3 Ears of Corn (These ended up weighing 10.7 ounces of kernels)

1 1/2 ounces of Cream Cheese

1/2  Tablespoon Butter

1/4  Teaspoon Seasoned Salt

2 Green Onions sliced for Garnish

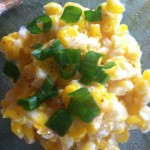
Place all ingredients except green onion in a saucepan over medium heat.  Stir until melted & heated through.   Garnish with sliced green onion. Serve!

Tip – You can always add a dash of water if you think the mix is too thick. Not too much though. I ended up not needing to do so.
My Homework Project from IFBC – Christmas Lima Bean & Dill Pollen

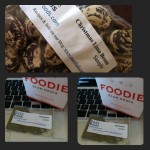
I attended the International Food Bloggers Conference in Portland, Oregon this year.  What a fun event and learned so much.  In attending a conference session titled “Break Out of Your Recipe Routine: Where to Discover New Meals to Blog About”   hosted by Alex Malott of Foodie.com and Currin Berdine of StumbleUpon.  They had a wealth of information to help trigger new ideas, recipes, and more.  In addition, they gave us “homework”.  Each of us received a package of ingredients to take home, create a recipe and write about it.  In my package courtesy of Marx Foods there were two ingredients I had never heard of before Christmas Lima Beans and Dill Pollen.

Homework

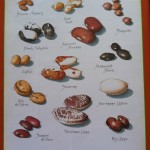
I wondered why they were called Christmas Lima Beans, because at first glance they looked speckled with a brown color, but now that I have soaked them they are a lively red and white/tan color resembling the colors of Christmas!

Heirloom Beans

The first website I visited told me how long to soak the beans (8 hours) and to cook them about 45 minutes.  Well, when that did not work I looked for more website posts.  I found one where the author said cooking the beans could take as long as 2 hours, and to not over cook them.  Well, these beans ended up cooking for hours!  I think at least 4 until they were done.  I lost count after a while.  I think I tasted more raw beans during the process than what was left at the end of the “assignment”. Well, I chose to make a bean salad with my ingredients and the end result was quite tasty.

Local Note – The green beans in this recipe are from Smith Family Farm in Knightsen, California.


Christmas Lima Bean & Farm Stand Green Bean Salad

Ingredients:

Christmas Lima Beans

Farm Stand Green Beans

1/4 cup White Wine Vinegar

1/2 cup Oil

1 to 2 teaspoons Dijon Mustard

1/4 teaspoon garlic powder

Salt & Pepper to taste

Dash/smidgen Dill Pollen

Soak the Christmas Lima Beans for at least 8 hours or overnight water covering the beans by over 2 inches.  Rinse. Then cook the beans in water, covering them with several inches of the water.  Boil until tender.  Replace water as necessary.  Once tender, drain and let cool.

Snap ends off green beans.  Place in steamer and steam with water until tender. Cool beans. Place both the Christmas Lima Beans and the green beans in a bowl.

Mix remaining ingredients, except dill pollen,  in a jar with a lid.  Place lid on jar and shake until all ingredients are mixed/emulsified.  Dress beans with the Dijon Mustard Vinaigrette to taste.  Sprinkle a very small amount of the dill pollen on the salad (the dill pollen is very potent).  Stir/toss the salad to coat. Marinate in the refrigerator overnight.  Serve as a side dish with BBQ meats, or as a dish by itself.  Enjoy!

Crustless Heirloom Tomato Pie – Need Help

UPDATE – I think I have it figured out.  Will test the recipe again and post next week.  Thank you!


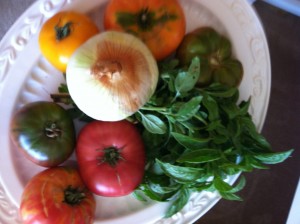
I am making a recipe for the above mentioned pie and I need your help.  The end result was a very tasty dish, with unpleasant results.  The dish ended up being very watery, I believe from the tomatoes.

What I did with the tomatoes was slice them and sprinkle with salt, so the water would leach out.  I let them do that for at least 2 hours and they did leach a lot of water.  Before assembling in the casserole dish, I patted each one dry.  I then baked the pie for about 45 minutes and then let it rest for about 10 minutes.  There must have been at least 1/2 cup of liquid at the bottom of the dish.

What are your recommendations for a more pleasant outcome?  Should I let the tomatoes sit longer?  Is there a different method?  I don’t want to use different tomatoes as this dish was really tasty (coming from someone who is not a big fan of tomatoes) and very eye appealing with all the different colors of tomatoes.

Any suggestions, recommendations and tips would be greatly appreciated!  Thank you and Cheers!

Brentwood Cornfest Recipe Contest

Every year in July there is a corn celebration in Brentwood, California. It’s called the “Brentwood Cornfest” and is held in the second week of that month.

This year I saw the bulletin requesting recipes for their contest. I thought about it and decided to submit a recipe that include this lucious Brentwood Corn. I chose a salad/side dish for the event. I used to buy a similar salad from a catering establishment in Downtown Brentwood called “Gooseberry Fool”. A nice little gourmet store in the heart of Downtown. Sadly, the store is no longer there but many good memories remain. So, I took this salad, put my own spin on it and added grilled corn.

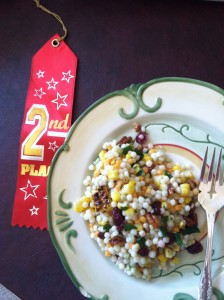
For the contest, ten of us competed for a first, second and third prize. This recipe took second place in the competition and I simply called it “Israeli Couscous with Grilled Corn”.

Have you ever tried Brentwood Corn? If not, you are missing out on some of the best corn you have never tasted! Hard to explain, you really have to try it for yourself. It is sweet, without being too sweet, large crunchy kernels and large cobs. I prefer the yellow version, but many people here prefer the white corn.

Israeli Couscous Salad with Grilled Corn

1 pkg. Israeli Couscous (prepare as directed on package)

1/3 cup Dried Cranberries
2 cobs Corn, grilled
2 tbsp. Italian Parsley, chopped
3 Green Onions, sliced (green part only)
1/3 cup Pecans, toasted
1/2 cup Lemon and Olive Oil dressing (recipe below)

Mix together all ingredients, except dressing. Stir well. Add dressing. Add more than 1/2 cup dressing if desired. Refrigerate. Serve chilled.

Lemon and Olive Oil Dressing

Zest of 1 Lemon
1/2 cup Lemon Juice
1/2 cup Olive Oil
3 cloves Garlic
1 tsp. Salt

Grate/mince garlic. Combine with salt to make a paste. In container with lid, add all ingredients. Shake well. Makes 1 cup.

Note: I like to add the toasted pecans right before serving, that way they remain toasty & crunchy. I used “Rice Select” Pearl Couscous (Tri-Color), using the whole container (11.53 oz.) I think it makes for a very colorful and pleasing side dish.

Thank you to the Brentwood Cornfest and KSFO 560 Radio for sponsoring the event!

International Food Blogger Conference 2012 Portland